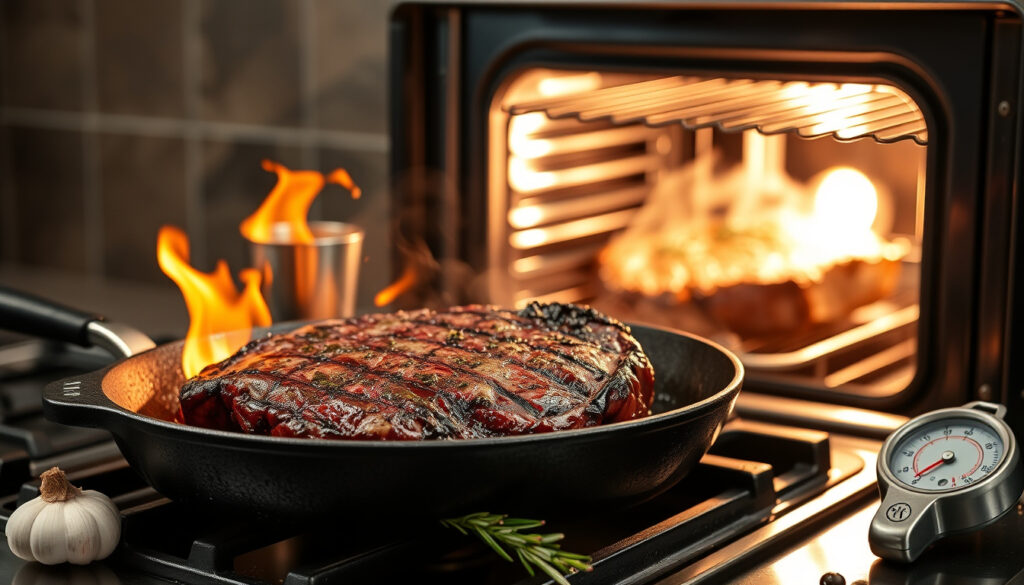
How to Cook Steak – Pan, Oven and Pro Guide
Achieving restaurant-quality steak at home requires understanding the relationship between heat, time, and internal temperature. Whether pan-searing a ribeye or finishing a thick-cut sirloin in the oven, the difference between a chewy result and a perfectly juicy steak often comes down to technique. This guide covers the essential methods for cooking steak to medium rare and other doneness levels, with specific guidance for popular cuts and expert-recommended approaches.
The Maillard reaction—the chemical process responsible for that deep, savory crust—only happens when the steak surface temperature exceeds 280°F. Meanwhile, the interior requires precise temperature control to reach the desired doneness without overcooking. By understanding how heat transfers through different cuts, home cooks can consistently achieve results that rival professional steakhouses.
Several factors determine success: the steak’s starting temperature, the cooking method chosen, and crucially, the resting period after heat is removed. Those who skip the rest phase often wonder why juices escape onto the cutting board rather than staying in the meat. Master these fundamentals, and the difference between acceptable and exceptional becomes clear.
How to Cook Steak in a Pan
Pan-searing remains the most accessible method for cooking steak at home, requiring only a heavy-bottomed skillet and high heat. A cast-iron pan excels at this task because it retains and distributes heat evenly, creating the consistent surface temperature needed for a proper sear.
The process begins well before the pan heats. Professionals recommend bringing steak to room temperature for 20 to 30 minutes before cooking, which allows for more even heat penetration throughout the cut. During this time, the steak should be patted completely dry with paper towels—surface moisture is the enemy of a crispy crust.
Step-by-Step Pan Method
Season generously with salt and pepper, applying approximately one teaspoon of kosher salt per pound. Some cooks prefer to salt 40 minutes or longer in advance, allowing the salt to draw moisture to the surface, which then reabsorbs with added flavor. Others season immediately before cooking.
Heat the pan over high heat for five minutes until it begins to smoke slightly. Add a thin layer of high smoke-point oil such as avocado or refined grapeseed, then carefully place the steak in the pan. Resist the urge to move the steak for the first two minutes—a common mistake that releases steam and prevents browning.
For a one-inch-thick steak targeting medium rare, cook approximately three to four minutes per side. Thicker cuts require adjusted timing, but the internal temperature provides the definitive guide rather than clock-watching alone.
Gordon Ramsay advocates flipping the steak every 30 seconds while basting with melted butter, garlic, and thyme. This method, used in professional kitchens, promotes even cooking and builds flavor through continuous contact with aromatic compounds in the basting fat.
Achieving the Perfect Sear
The sear quality depends on three variables: surface dryness, pan temperature, and contact time. An instant-read thermometer inserted into the thickest part of the steak, avoiding bone or fat deposits, provides the most reliable reading. The steak is ready to flip when the surface shows a deep mahogany color rather than gray.
Overcrowding the pan causes temperature to drop dramatically as moisture releases from multiple steaks. This steaming effect prevents the Maillard reaction and results in gray, mushy surfaces. Cook one to two steaks maximum in a standard 12-inch skillet for optimal results.
After removing from heat, the steak must rest for a minimum of five minutes. During this time, internal temperature rises an additional five to ten degrees through residual heat—a phenomenon called carryover cooking. Removing the steak from heat three to five degrees below the target temperature accounts for this effect.
How to Cook Steak to Medium Rare and Other Doneness Levels
Understanding doneness levels requires familiarity with internal temperature ranges rather than subjective descriptions of color or texture. An instant-read digital thermometer eliminates guesswork and provides consistent results across multiple cooking sessions.
Medium rare—reaching an internal temperature of 130 to 140°F—represents the most popular doneness level for whole muscle cuts. At this temperature, the muscle fibers have relaxed enough to become tender while retaining enough structural integrity to hold their shape and juices. The center displays a warm red color that many find most flavorful and visually appealing.
| Doneness | Internal Temperature (°F) | Internal Temperature (°C) | Visual Description | Remove from Heat (°F) |
|---|---|---|---|---|
| Rare | 125–130 | 52–55 | Cool red center, very soft | 118 |
| Medium Rare | 130–140 | 55–60 | Warm red center, juicy | 125 |
| Medium | 140–150 | 60–65 | Warm pink center, firmer | 136 |
| Medium Well | 150–155 | 65–69 | Slight pink, firm | 143 |
| Well Done | 160+ | 71+ | No pink, dry | 154 |
Different sources cite slightly varying temperature ranges for each doneness level. Omaha Steaks lists medium rare as 130 to 140°F, while Certified Angus Beef specifies 135°F as the target. These variations reflect minor differences in methodology rather than conflicting information. The most important principle remains using a calibrated thermometer rather than relying on time estimates alone.
Carrying Over During Rest
Carryover cooking causes internal temperature to rise between 5 and 10°F during the resting period, depending on the steak’s thickness and starting temperature. A steak removed at 125°F will reach approximately 135°F after five minutes of resting—landing squarely in the medium rare range. Planning for this effect prevents inadvertent overcooking.
Larger, thicker steaks experience more pronounced carryover than thin cuts. A two-inch-thick ribeye might gain 10 to 15°F during rest, while a half-inch flank steak might only rise 2 to 3°F. Adjust removal temperatures accordingly based on the cut’s dimensions.
The USDA recommends a minimum internal temperature of 145°F for steaks with a three-minute rest period. However, whole muscle cuts cooked to medium rare present minimal risk when properly seared, as the high surface temperature kills any surface bacteria.
How to Cook Popular Steak Cuts Medium Rare
Different cuts respond differently to heat based on their muscle structure, fat content, and connective tissue. Understanding these characteristics helps cooks choose appropriate methods and avoid common mistakes that lead to tough or dry results.
Sirloin Steak
Sirloin comes from the rear portion of the cow, offering a balance of flavor and tenderness at a moderate price point. This cut is relatively lean, which means it loses moisture quickly when overcooked. Medium rare represents the upper limit of doneness for sirloin—anything beyond produces noticeably tougher texture as the muscle fibers contract and squeeze out remaining juices.
Due to its leanness, sirloin benefits from quick, high-heat cooking rather than extended oven exposure. A one-inch sirloin typically requires three to four minutes per side in a screaming-hot pan. The Omaha Steaks guide recommends limiting oven time and relying primarily on pan-searing for this cut.
Ribeye Steak
Ribeye excels at medium rare because its generous marbling—intramuscular fat—provides both moisture and flavor that remain intact at lower temperatures. The fat renders beautifully at 130°F, creating that buttery, rich taste associated with premium steakhouses.
The ribeye’s fat content also makes it more forgiving than leaner cuts. Slight temperature variations produce less dramatic texture changes because the melted fat lubricates the muscle fibers even as they tighten. For those learning to cook steak, ribeye offers more margin for error.
Fillet Steak
Fillet (also called tenderloin) is the most tender cut on the animal, coming from a muscle that does minimal work. Despite its tenderness, fillet lacks the fat content of ribeye, making it prone to drying if overcooked. The Sullivans Steakhouse temperature guide notes that this cut benefits from the reverse-sear method, which prevents overcooking the center while developing a proper crust.
Because fillet is uniformly thick with a cylindrical shape, it responds well to oven finishing after initial searing. The consistent thickness ensures even heat distribution throughout the cut.
Rump Steak
Rump offers the most economical option among premium cuts, coming from the hip area of the cow. This cut contains more connective tissue than sirloin or ribeye, which requires proper cooking technique to break down into tender, gelatinous texture rather than chewy result.
Medium rare rump works well when the steak is sliced against the grain after resting. Cutting perpendicular to the muscle fibers shortens them perceptually, creating a more tender eating experience despite the cut’s inherent density. Allow at least five minutes of rest before slicing to retain juices.
How to Cook Steak in the Oven
Thicker steaks—those exceeding one inch in thickness—present a challenge for pan-only methods. The interior can remain dangerously underdone while the surface overcooks, or the reverse can occur with extended pan time. The oven provides gentle, even heat that brings the entire steak to temperature without burning the exterior.
This hybrid approach, often called the reverse sear, reverses the traditional order by starting in the oven and finishing with a high-heat sear. The method produces remarkably even doneness throughout the cut while still achieving an excellent crust.
Pan-Oven Method for Thick Steaks
Preheat the oven to 250 to 275°F, placing the steak on a wire rack set over a baking sheet. This elevation allows hot air to circulate around the entire cut, promoting even heating. Insert an instant-read thermometer into the thickest portion and cook until the internal temperature reaches 10 to 15°F below the target doneness.
Timing depends heavily on thickness. A one-inch steak requires approximately 20 to 25 minutes in the oven, while a 1.5-inch cut needs 30 to 40 minutes. Two-inch steaks may require 45 to 60 minutes. These times represent estimates—the thermometer provides the definitive endpoint.
| Thickness | Oven Time (250°F) | Sear Time (per side) |
|---|---|---|
| 1 inch | 20–25 minutes | 1–2 minutes |
| 1.5 inches | 30–40 minutes | 1.5–2 minutes |
| 2 inches | 45–60 minutes | 2 minutes |
After reaching the target oven temperature, transfer the steak to a screaming-hot cast-iron skillet for the sear phase. This brief, high-heat contact develops the crust without raising the interior significantly. Each side requires only one to two minutes for thinner cuts, two to three minutes for thicker ones.
This method works particularly well for ribeye and fillet, where the fat content ensures a flavorful crust even without extended contact with the hot pan. Leaner cuts like sirloin also benefit from the reduced total pan time, which prevents excessive moisture loss.
Always thaw frozen steaks completely in the refrigerator before using the pan-oven method. Cooking from frozen produces unpredictable temperature gradients and increases the risk of bacterial contamination in the interior.
Tips for Cooking the Perfect Steak Like Gordon Ramsay
Professional chefs approach steak cooking with practiced precision, but the underlying principles remain accessible to home cooks. One common thread among experts involves the relationship between surface preparation, heat management, and rest time.
Salt Timing and Surface Preparation
Gordon Ramsay emphasizes “hot pan, cold steak, lots of salt” as the foundation of his approach. The salt recommendation extends beyond simple seasoning—some practitioners apply salt 40 minutes or longer before cooking, a technique borrowed from Serious Eats research that demonstrates improved browning and flavor penetration.
For those seeking an even more pronounced crust, leaving the steak uncovered on a rack in the refrigerator overnight produces a dry surface ideal for browning. The Heartstone Farm guide recommends this approach for competitive or special occasion cooking where visual presentation matters.
Basting Technique
Ramsay’s signature move involves frequent flipping combined with basting using compound butter. Rather than cooking one side completely before turning, he flips every 30 seconds while continuously spooning melted butter infused with garlic and thyme over the surface. This technique builds layers of flavor while promoting more even cooking.
The butter baste captures aromatic compounds released from the steak and the pan, creating an emulsion that coats the meat with additional richness. Some chefs add fresh herbs directly to the butter for extra complexity.
The Rest Period
Professionals consistently emphasize patience during the rest phase. Ramsay instructs cooks to “let it relax” so juices stay inside rather than escaping onto the cutting board. A minimum of five minutes under loosely tented foil allows muscle fibers to reabsorb moisture that would otherwise be lost during cutting.
Thicker cuts benefit from extended rest periods—up to ten minutes for two-inch steaks. The internal temperature continues rising during this time due to carryover cooking, so adjust removal timing accordingly.
Step Timeline: The Complete Steak Cooking Process
A systematic approach ensures consistent results whether cooking for one or preparing multiple steaks for a gathering. The following sequence applies to pan-seared and pan-oven methods alike.
- Remove steak from refrigerator 20 to 30 minutes before cooking to reach room temperature. Pat completely dry with paper towels.
- Season generously with kosher salt and freshly ground black pepper. Optional: Apply salt up to 40 minutes in advance for enhanced flavor penetration.
- Preheat cooking vessel—pan over high heat or oven to 250 to 275°F—while the steak comes to temperature.
- For pan-oven method: Cook on wire rack until internal temperature reaches 10 to 15°F below target doneness.
- Sear in screaming-hot pan for specified time per side, adding butter, garlic, and thyme during final minutes if desired.
- Remove from heat and tent loosely with foil. Rest for minimum five minutes.
- Check final temperature and confirm doneness. Adjust seasoning before serving if necessary.
What Works and What Remains Uncertain
Certain aspects of steak cooking rest on well-established food science principles that produce predictable results when applied correctly. Other elements involve variables that may affect outcomes depending on specific circumstances.
Established Facts
The relationship between internal temperature and doneness is firmly established through food science and validated by professional practice. A properly calibrated instant-read thermometer provides reliable guidance regardless of cooking method. The Maillard reaction requires surface temperatures exceeding 280°F and a dry surface to develop properly. Carryover cooking adds approximately 5 to 10°F during rest depending on thickness. These principles apply universally across steak cuts and cooking environments.
The USDA Food Safety and Inspection Service confirms that steaks are safe at 145°F with a three-minute rest, and that medium rare doneness presents minimal risk for whole muscle cuts that have been properly seared.
Variables That Remain Uncertain
Exact cooking times vary based on numerous factors including initial steak temperature, pan or oven accuracy, and individual stove performance. Times provided in guides represent averages that may require adjustment for specific equipment. The optimal salt timing—whether immediately before cooking or 40 minutes earlier—depends on preferences for surface moisture and crust texture; both approaches produce acceptable results.
The question of whether to oil the steak or the pan remains debated among professionals. The critical factor is achieving a dry surface with sufficient heat, regardless of where the oil contacts first.
The Science Behind the Method
Understanding why certain techniques produce better results helps cooks adapt their approach to different situations rather than following rigid formulas. The Maillard reaction explains why high heat and dry surfaces matter—the chemical process creates hundreds of flavor and aroma compounds when amino acids react with sugars at elevated temperatures.
Collagen—the connective tissue present in varying amounts depending on cut—converts to gelatin when exposed to moist heat for extended periods. This conversion occurs above 160°F, which is why longer cooking methods work better for cuts with more connective tissue. However, this extended cooking also toughens the muscle fibers themselves, which is why premium cuts have less connective tissue and require less cooking time.
Fat content plays multiple roles beyond flavor. Marbled fat acts as an internal lubricant, keeping the meat moist as it renders. For lean cuts, moisture retention depends entirely on proper technique rather than inherent fat content. A proper understanding of ingredient ratios helps home cooks adjust seasoning for different steak sizes.
Expert Sources and Professional Guidance
Several authoritative sources inform the techniques presented in this guide. Each brings specialized expertise that, when combined, provides comprehensive coverage of steak cooking principles.
The Steak School temperature chart provides detailed timing and temperature guidelines based on professional kitchen experience. Omaha Steaks offers detailed cut-specific recommendations from a major producer with decades of customer feedback. The Certified Angus Beef brand contributes authoritative information from the beef quality assurance perspective.
“The difference between a great steak and an ordinary one often comes down to patience during the resting period. Let the carryover cooking work for you rather than fighting against it.”
— Professional steakhouse technique guides
Putting It All Together
Cooking steak successfully combines understanding of heat transfer, respect for timing, and appreciation for the ingredient itself. By applying the methods outlined above, home cooks can achieve reliable results that compare favorably with restaurant-quality output.
The investment in an instant-read thermometer pays dividends immediately—removing guesswork and replacing it with precision. Combined with proper resting technique and attention to surface preparation, this single tool transforms outcomes more dramatically than any exotic seasoning or expensive equipment.
Experiment with different cuts to discover personal preferences, and consider how roasting techniques for other proteins might inform your approach to steak. The principles of heat management, rest time, and temperature monitoring apply across cooking methods and protein sources.
Frequently Asked Questions
How long should I rest a steak after cooking?
Allow a minimum of five minutes for thin cuts up to one inch. Thicker steaks exceeding 1.5 inches benefit from eight to ten minutes of resting. Loosely tent the steak with foil to retain warmth without trapping steam.
Can I cook steak from frozen?
While technically possible using the oven method with extended time, thawed steaks produce more predictable results. If cooking from frozen, add significant time and monitor internal temperature carefully throughout the process.
What temperature is medium rare for steak?
Medium rare steak reaches an internal temperature of 130 to 140°F. Remove from heat at approximately 125°F to account for carryover cooking during the resting period, when temperature will rise an additional 5 to 10°F.
Should I salt steak before or after cooking?
Both approaches work. Salting 40 minutes or more before cooking draws moisture to the surface that reabsorbs with enhanced flavor. Seasoning immediately before cooking produces a saltier crust. Choose based on available time and preference.
Why did my steak turn out tough?
Overcooking is the most common cause of tough texture, particularly for lean cuts like sirloin and fillet. Other factors include cutting with the grain rather than against it, insufficient rest time before slicing, or cooking cold steak that spends too much time at moderate temperatures.
Is medium rare steak safe to eat?
For whole muscle cuts with proper searing, medium rare presents minimal food safety risk. The high heat of searing kills surface bacteria. However, those with compromised immune systems should follow USDA guidelines recommending 145°F minimum for all steak.
How hot should a pan be for searing steak?
The pan should reach at least 500°F for optimal searing. A smoking hot cast-iron skillet, preheated for five minutes over high heat, achieves this temperature. The Maillard reaction requires surface temperatures above 280°F, which only occurs in an extremely hot pan.
What is the reverse sear method?
The reverse sear cooks the steak slowly in the oven first to bring it to temperature, then finishes with a brief, high-heat sear in a pan. This method produces more even doneness throughout thick cuts while still achieving an excellent crust.
More related posts
 John Alford – Grange Hill Actor Dies in Prison After Child Sex Conviction
 Peter Kay Wife Cancer – Sarah’s Role and Recovery Facts
 Minecraft Advent Calendar 2025 – Release Date, Price & Best UK Deals
 2024 Land Rover Defender – Prices, Specs and Trims
 Thursday Murder Club Books – Complete Series Order Guide
 King Spain – Role, Family & History of the Modern Monarchy
 TV Shows with Keeley Hawes – Complete Guide to Her Career
 How to Schedule an Email in Outlook – Complete Platform Guide
